Concrete4U | Concrete Admixtures, Tools, and Production Machines

How to Get Concrete Foaming Agent Right: The Step-by-Step Guide to Lightweight Concrete That Works
Have you ever spent an entire afternoon mixing a batch of lightweight concrete only to watch it collapse into a heavy, dense puddle before your eyes? Or maybe you’ve gotten the density right, but the compressive strength was so low the block crumbled under your thumb. You are not alone. In nearly every Reddit thread about foam concrete, the same frustration surfaces: the foam disappears, the structure sinks, and the project fails. The culprit is almost never the cement or the water. It is the way you handle the concrete foaming agent.
I have been in this industry for over twenty years. I have seen foaming agents blamed for failures that were actually caused by bad mixing technique or incompatible cement. The truth is, foaming agents are remarkably forgiving if you respect their chemistry. But respect means precision. Every gram, every second, every temperature degree matters. This guide is going to walk you through exactly what to do, step by step, with the numbers and tolerances you need to get consistent results every single time.
Step 1: Understand Your Concrete Foaming Agent Type
Before you even switch on your foam generator, you must know what you are pouring into it. There are two primary families: synthetic agents and protein-based agents. The choice you make dictates your density range, your curing time, and your end-use temperature limits.
Synthetic foaming agents are typically based on sodium alkyl ether sulfates or similar surfactants. They produce a lightweight, bouncy foam with a lower density, often between 30 g/L and 80 g/L. The foam bubbles are small and uniform, which gives you better control over the final concrete density. The trade-off is that synthetic foams are more sensitive to cement alkalis and high mixing temperatures. Many Reddit users who report “foam vanishing in the mixer” are using a synthetic agent with a rapid-hardening cement that has high free lime content.
Protein-based foaming agents are derived from hydrolyzed animal proteins (often keratin from hooves or horns). These foams are heavier, typically 80 g/L to 120 g/L, but they are much more robust. They can withstand aggressive cement chemistries and higher mixing energies without collapsing. The bubbles are larger, which can lead to slightly lower surface finish quality on precast panels. But for void filling, trench backfill, or any application where compressive strength below 2 MPa is acceptable, protein-based agents are the workhorses.
Do not mix the two types. They are chemically incompatible. If you switch from synthetic to protein, thoroughly flush your foam generator, all hoses, and your mixing tank with clean water and then with a 5% solution of concrete defoamer, followed by another fresh water rinse. Residual surfactant from a synthetic agent will destabilize protein foam immediately.
Step 2: Calibrate Your Foam Generator and Measure Foam Density
This is the step most people skip, and it is the single biggest source of failure. Foaming equipment says a lot on the dial, but the real output depends on water temperature, air pressure, and the actual concentration of your concrete foaming agent solution.
Here is the procedure. Prepare your foaming agent solution at the manufacturer’s recommended dilution, typically between 2% and 5% by weight of concentrate to water. Use water between 15°C and 25°C. Colder water reduces foam expansion. Hotter water collapses the foam prematurely. Fill your foam generator with this solution. Connect it to an air compressor. Adjust the air pressure to between 3 bar and 5 bar, depending on your equipment manual.
Now, collect a sample of the foam in a pre-weighed container of known volume, say a 10-liter bucket. Weigh it. Calculate the foam density: net weight of foam divided by volume. Record the number. A synthetic agent should give you foam density between 40 g/L and 60 g/L. A protein agent should be between 80 g/L and 100 g/L. If your density is outside this range, do not proceed. Adjust your dilution ratio or your air pressure until you hit the target. Write down this calibration value. You will use it to calculate your concrete mix design.
Step 3: Design Your Mix for Target Plastic Density
For foamed concrete, the specification is almost always the plastic density (wet density) in kg/m³. Common targets are 600, 800, 1000, or 1200 kg/m³. The lower the density, the more foam you need, and the lower your final compressive strength will be.
Begin with your cement paste. Use ordinary Portland cement (Type I or Type II) or a special cement like calcium sulfoaluminate if you need early strength. Your water-to-cement ratio by mass should be between 0.45 and 0.55. Do not exceed 0.55. Too much water will cause the foam to swim up and separate, giving you a spongy crust on top and a dense block at the bottom. If your cement requires extra water for workability, add a concrete water reducer (superplasticizer) at 0.2% to 0.5% by weight of cement. This will give you the slump you need without raising the water content.
Calculate the volume of foam required. The formula is straightforward. First determine the volume of your base mix (cement + water + any fillers). Subtract that from your target concrete volume. The difference is the volume of foam you need to add. But because foam contains air, you must account for the fact that only about 98% of the foam volume actually remains as air after mixing. So multiply your calculated foam volume by 1.02. Add the foam slowly during mixing.
Here is a sample calculation for a 1000 kg/m³ density mix. Assume 450 kg cement, 225 kg water (w/c = 0.50). Base mix volume = (450/3.15) + 225 = 142.9 + 225 = 367.9 liters per cubic meter. Subtract from 1000 liters: 632.1 liters foam needed. Multiply by 1.02: 644.7 liters foam. Inject that volume while mixing at low speed (60 to 100 RPM).
Step 4: Mixing Procedure and Timing Precision
Mixing is where most failures occur. The goal is to distribute the foam uniformly without rupturing the bubbles. Use a forced-action mixer, not a gravity drum mixer. Drum mixers tumble the foam against itself and pop it like bubble wrap.
Here is the exact sequence. Add all the cement and any dry additives (fibers, early strength agent, redispersible polymer powder, nano-modifier, or special cement blend) to the mixer. Add 80% of your mixing water. Mix for 30 seconds to form a uniform slurry. Add the concrete water reducer or superplasticizer with the remaining 20% of water, if needed. Mix for another 60 seconds. Stop. Scrape the sides. You must have a smooth, fluid paste with a slump between 200 mm and 240 mm.
Now, with the mixer running at its lowest speed, start adding the pre-generated foam through a hose or funnel. Add it steadily over a period of 60 to 90 seconds. After all foam is in, mix for exactly 30 more seconds. Do not overmix. Overmixing beyond 45 seconds will collapse 15% to 30% of your foam and raise your density. Immediately after stopping, measure the wet density of a sample. Use a pre-weighed 1-liter cylinder. Fill it, strike it even, weigh it. Your reading should be within ±30 kg/m³ of your target. If it is high, add more foam and remix for 10 seconds. If it is low, you have already collapsed too many bubbles. Discard this batch and tighten your mixing time on the next one.
Step 5: Stability Testing Before Casting
You must test foam stability before you pour a single block. Fill a 100 mm cube mold with your fresh foamed concrete. Cover it with plastic to prevent evaporation. Let it sit undisturbed for 60 minutes. After 60 minutes, check the surface. You should see no more than 2 mm to 3 mm of settlement. If you see significant subsidence (5 mm or more), your foam is unstable. The cause is usually one of three things. Either your foam density was too high (below 40 g/L for synthetic), your mixing water was too cold (below 12°C), or your cement has high C3A content that destabilizes surfactants. Many users on Reddit report this exact problem when using high early-strength cements without a compatibility check.
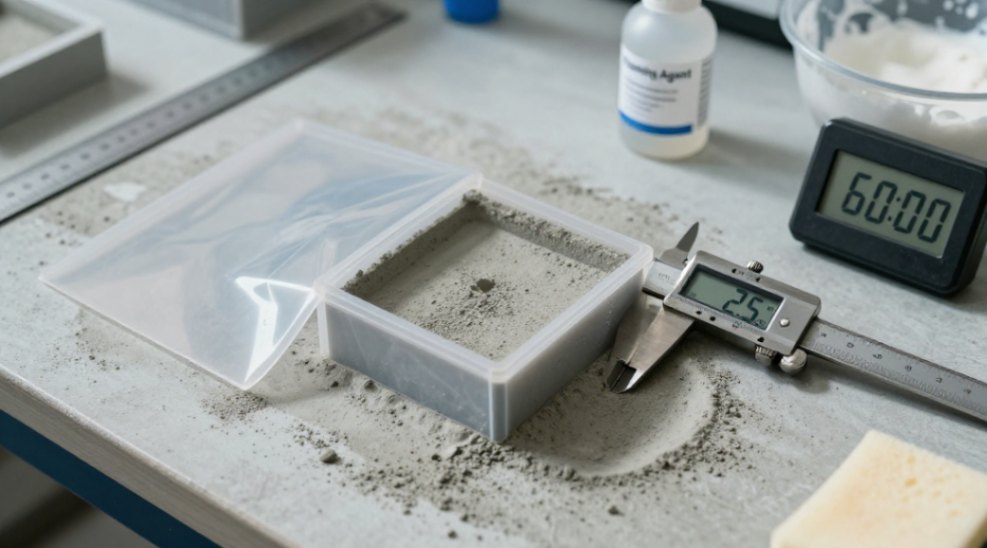
If the sample shows water rising to the surface (bleeding), reduce your water reducer dosage or lower your w/c ratio. If the sample shows large interconnected pores at the break surface, your foam bubbles are coalescing. Add a small dose of hydroxypropyl methyl cellulose (0.1% by weight of cement) or a nano-modifier to stabilize the bubble walls.
Step 6: Curing Conditions for Foamed Concrete
Foamed concrete cures differently than normal concrete. The high air content means lower thermal mass, so it heats up faster from hydration but also cools faster. Keep the molds in a covered area out of direct sun and drafts. Ideal ambient temperature is 20°C to 30°C. If you cure below 10°C, the hydration slows to a crawl, and the foam structure can partially collapse while the cement is still weak. If you cure above 40°C, rapid surface drying causes a skin to form, trapping moisture inside and leading to delayed ettringite formation and micro-cracking.
After 24 hours, demold carefully. The blocks will be very fragile at this point. Place them on a flat rack. Cover them with plastic sheeting or a damp burlap for 7 full days. Moist curing is critical. The high volume of air voids means there is less solid material to carry the stress of internal drying shrinkage. Without adequate moisture, you will see map cracking within a week. After 7 days, you can remove the covers and allow the concrete to air dry. Test compressive strength at 28 days according to ASTM C495 or your local standard.
Step 7: Quality Control Measurements That Matter
Every batch must be tested and recorded. I recommend a simple three-point check for each pour. Measure and record wet density, foam drainage, and hardened density. Foam drainage is a critical test that many ignore. Collect 200 mL of foam from your generator. Pour it into a graduated cylinder. Measure the volume of liquid that drains to the bottom over 30 minutes. Acceptable drainage for synthetic foam is less than 15 mL. For protein foam, less than 25 mL. Anything higher means your foam is too wet and will bleed in the concrete.
For hardened concrete, cut a representative sample from each batch. Weigh it dry. Then immerse it in water for 24 hours to saturate. Weigh it again suspended in water to measure the volume displacement. Calculate the hardened density: dry weight divided by volume. Compare this to your target. A difference of more than 50 kg/m³ indicates something went wrong in the mixing or curing. Check your logs for water content or foam dosage errors.
The table below summarizes the key parameters and acceptable ranges for each step of the process. Use it as a quick checklist during production.
| Parameter | Synthetic Agent Target Range | Protein Agent Target Range | Test Method |
|---|---|---|---|
| Foam density | 40–60 g/L | 80–100 g/L | Weigh known volume of foam |
| Foam drainage (30 min) | ≤15 mL | ≤25 mL | Graduated cylinder |
| Mixing water temperature | 15–25°C | 15–25°C | Thermometer |
| Water/cement ratio | 0.45–0.55 | 0.45–0.55 | Weight batch records |
| Base cement paste slump | 200–240 mm | 200–240 mm | Slump cone |
| Final wet density tolerance | ±30 kg/m³ of target | ±30 kg/m³ of target | 1L cylinder + scale |
| Mixing time after foam addition | 30–35 seconds | 30–35 seconds | Stopwatch |
| 60-minute settlement | < 3 mm | < 5 mm | Marked side of 100 mm cube |
| Curing temperature | 20–30°C | 20–30°C | Ambient thermometer |
Step 8: Avoiding Common Pitfalls with Admixtures and Water Quality
Admixtures can be your best friend or your worst enemy. A concrete defoamer, for example, will destroy your foam in seconds. Even trace amounts on an unwashed paddle can ruin a batch. Always use dedicated mixing tools for foamed concrete, or clean them with a 5% solution of sodium silicate followed by fresh water rinse. Sodium silicate acts as a mild alkaline cleaning agent that neutralizes residual defoamer compounds.
Water quality is another hidden variable. Hard water with high calcium or magnesium content can compete with the foaming agent surfactant, reducing expansion by 20% or more. If your water hardness exceeds 200 ppm as CaCO₃, use a chelating agent like a concrete water reducer that also softens water, or switch to softened or distilled water for the foaming agent solution. On the other hand, very soft water (below 50 ppm) can make the foam too bubbly and prone to collapse. The ideal range is 80 to 150 ppm.
For applications requiring lower densities (below 600 kg/m³), consider blending the foaming agent with a small amount of hydroxyethyl cellulose (0.05% by weight of the solution) to thicken the bubble walls. This is a common trick in the precast panel industry. But be warned: too much cellulose will slow your mix and create sticky foam that is difficult to disperse. Test on a small scale first.
Step 9: Storage and Shelf Life Maintenance
Concrete foaming agents are sensitive to temperature extremes. Protein-based agents can spoil if exposed to heat above 40°C for more than a few days. They will smell putrid and lose 50% of their expansion capacity. Synthetic agents are more stable but can degrade if frozen below 0°C and then thawed. Store your foaming agent concentrate in a cool, dry place between 10°C and 25°C. Do not store it in direct sunlight. UV light degrades surfactants over time.
Always close the container immediately after use. Evaporation changes the concentration. If you notice a thick skin or crystal formation on the surface, discard the batch. Do not attempt to re-dissolve it. The active surfactant has been chemically altered. A fresh 20-liter pail of synthetic foaming agent, stored correctly, will last 18 to 24 months. Protein-based agents typically have a shelf life of 12 to 18 months. Mark your containers with the purchase date and check them quarterly. In my experience, a degraded foaming agent is the number one cause of “inexplicable” failures in the field. Users on Reddit often blame their foam generator, but the real culprit is a container left in a hot truck for a week.
Step 10: When to Choose Foamed Concrete Over Alternatives
Foamed concrete is not the right solution for everything. If you need compressive strengths above 15 MPa, you should use lightweight aggregate concrete or aerated autoclaved concrete (AAC). Foamed concrete with foaming agents typically maxes out at 8 to 10 MPa at a density of 1200 kg/m³, and even at 1600 kg/m³ you rarely exceed 15 MPa. AAC gives you higher strength for the same density because it uses a chemical expansion reaction that creates a more uniform pore structure.
But foamed concrete wins on cost, flexibility, and on-site adaptability. You can produce it with a simple foam generator and a concrete mixer. You can pump it over long distances. You can fill complex shapes and voids without compaction. For thermal insulation blocks (density 400 to 600 kg/m³), roof screeds (density 600 to 800 kg/m³), and void fill beneath slabs (density 300 to 500 kg/m³), foamed concrete is the superior method. AAC requires a factory and autoclaves. Lightweight aggregates add cost and require precise moisture control. Foamed concrete, when you follow the steps above, gives you a consistent, predictable product with minimal capital investment.
If you are producing precast panels for non-load-bearing walls, use a foaming agent with a superplasticizer and a special cement type like calcium sulfoaluminate. This combination gives you demolding strength in 4 to 6 hours instead of 24 hours. Add a small fiber (polypropylene or glass) at 0.1% by volume to control plastic shrinkage cracking. For large floor screeds, use a synthetic foaming agent with a concrete water reducer to maintain flowability without excess water.
Now, take this guide and run one controlled test batch. Measure every variable. Record everything. Compare your results to the table above. You will probably find one thing you did differently. Adjust it. Run a second test. By the third batch, you will be producing foamed concrete that meets your density target within 20 kg/m³ and your strength target within 0.5 MPa. That is the level of control this industry requires. That is what separates a successful installation from a Reddit post titled “Help, my foam concrete turned into a brick.” Go calibrate your foam generator. The rest will follow.
Supplier
We are the global leader in lightweight concrete and advanced engineered foam solutions. Known globally for its commitment to research, innovation, and applied expertise, we have been providing engineered foam solutions since the early 2012’s.
We can supply high-quality concrete admixture and foam concrete related products all over the world.
The company has a professional technical department and quality supervision department, a well-equipped laboratory, and equipped with advanced testing equipment and after-sales customer service center.
If you are interested, please feel free and contact us.